Linux is not a secure desktop operating system. However, there are steps you can take to harden it, reduce its attack surface, and improve its privacy.
Before we start…
Some of the sections will include mentions of unofficial builds of packages like linux‑hardened, akmod, hardened_malloc, and so on. These are not endorsements — they are merely to show that you have options to easily obtain and update these packages. Using unofficial builds of packages means adding more parties to trust, and you have to evaluate whether it is worth doing so for the potential privacy/security benefits or not.

During Installation
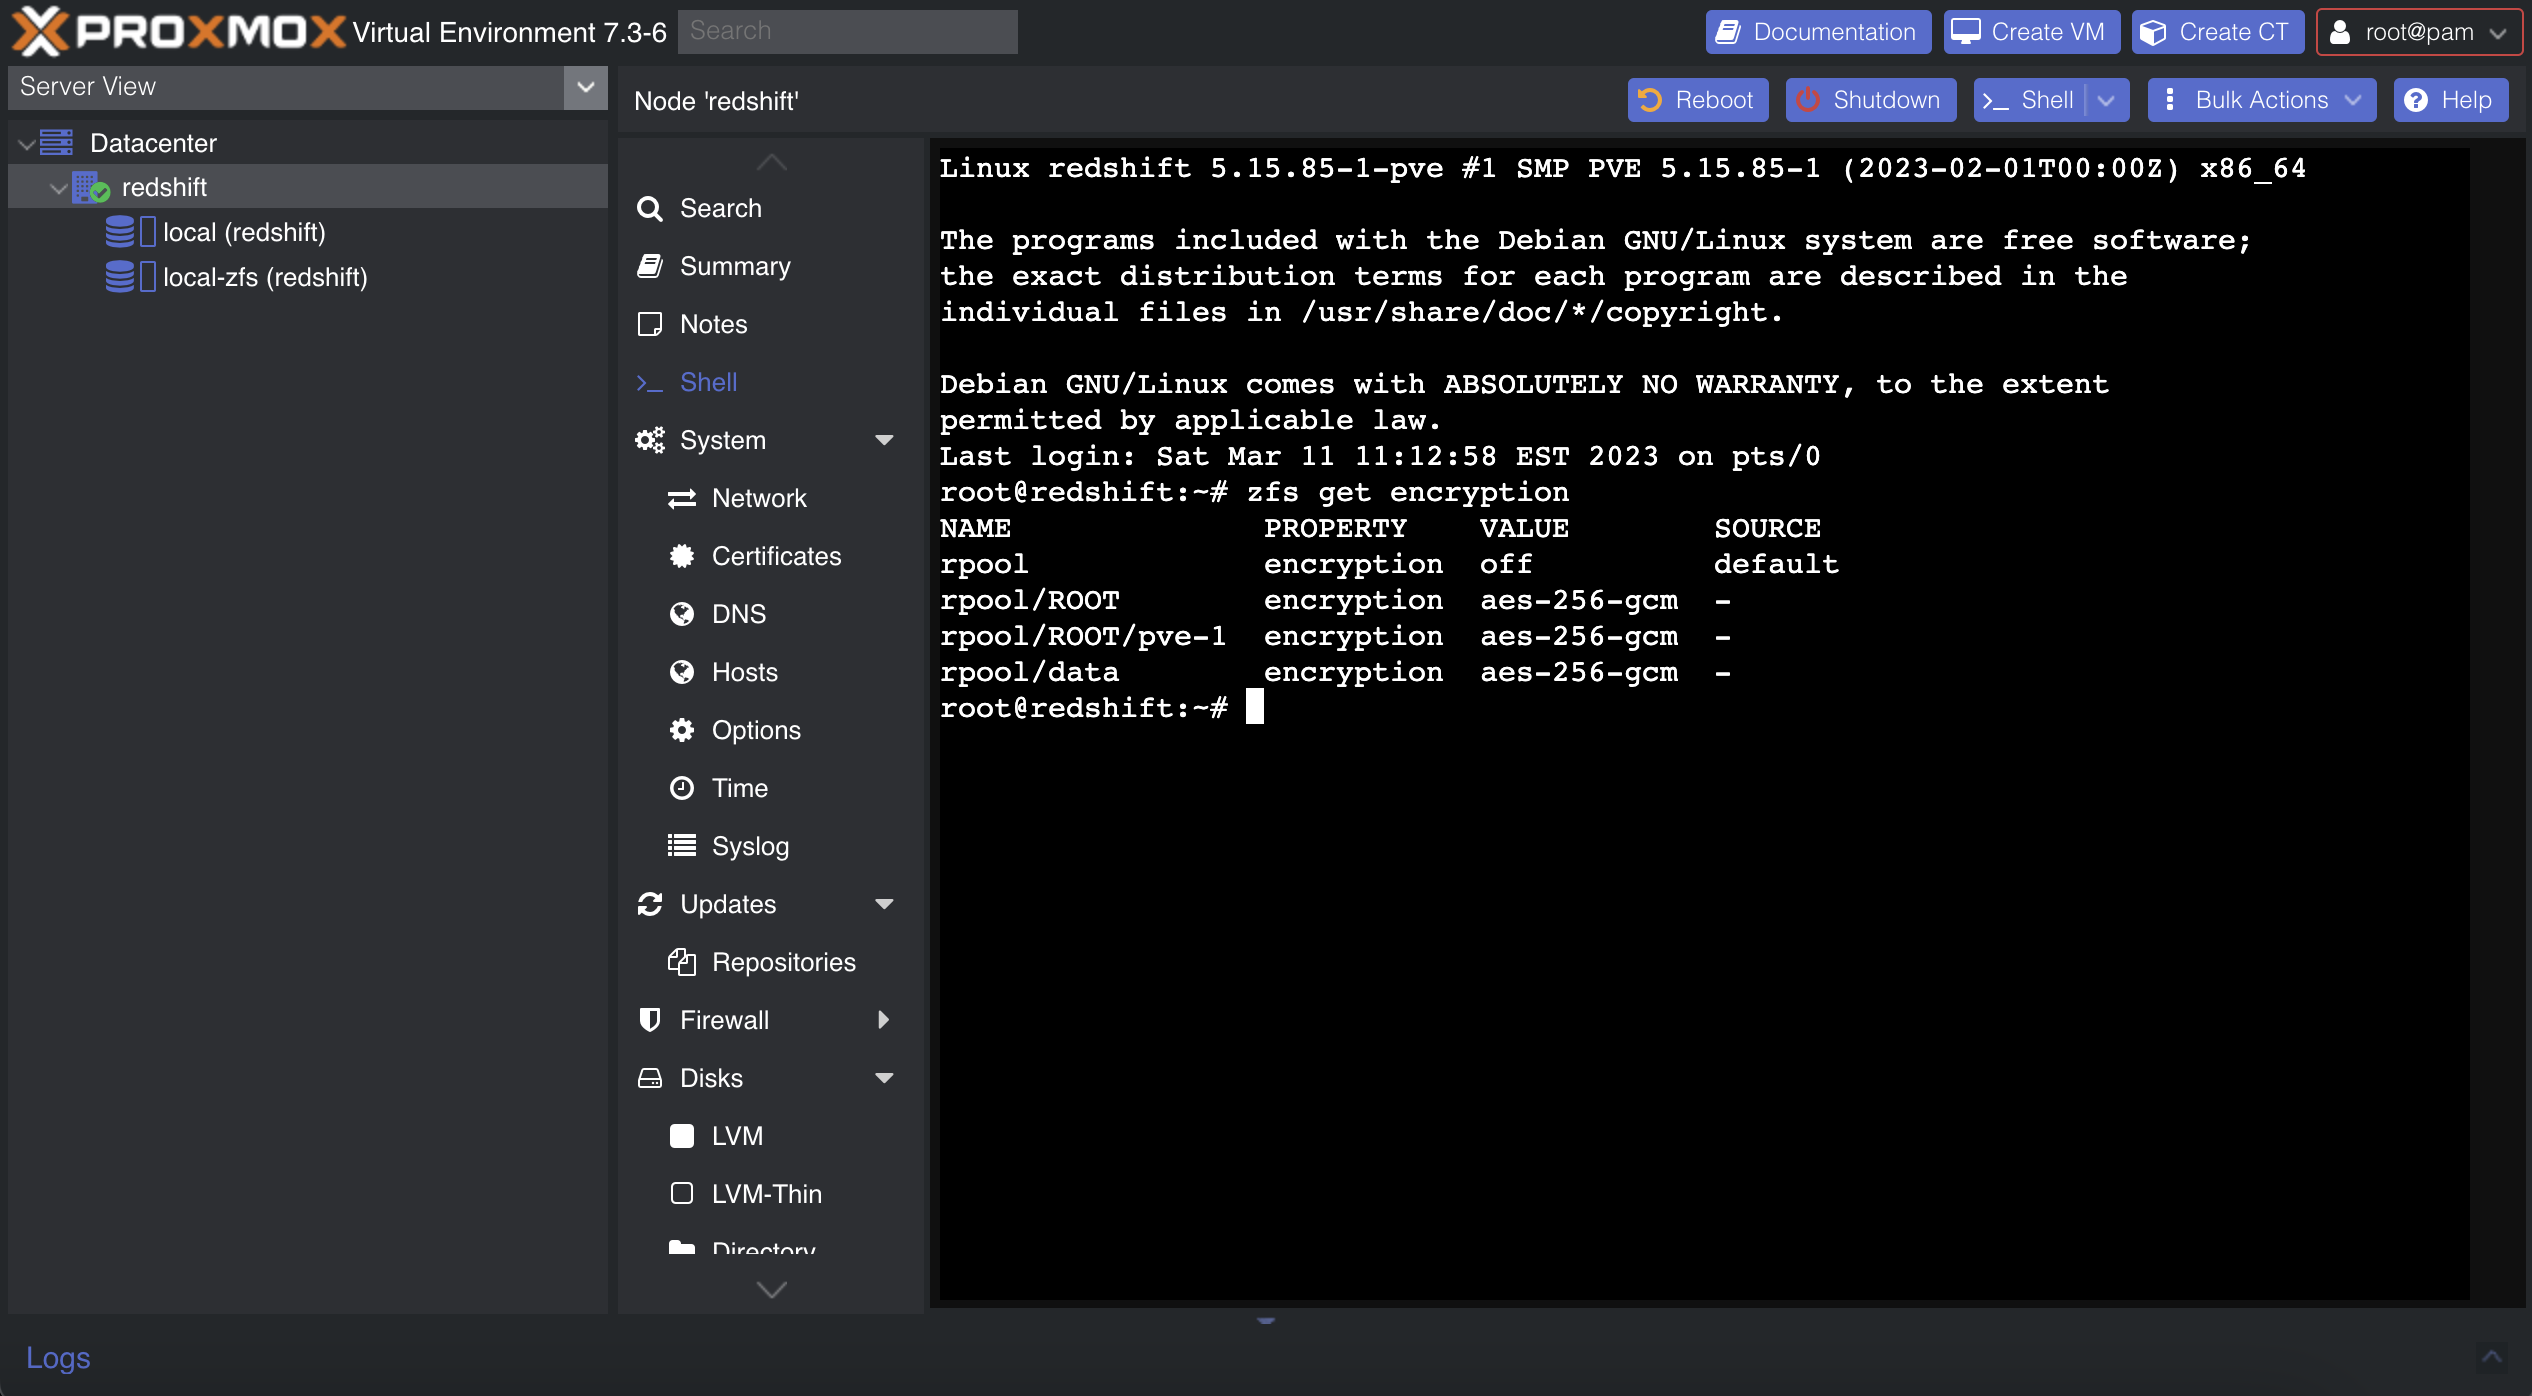
Drive Encryption
Most Linux distributions have an option within its installer for enabling LUKS full disk encryption. If this option isn’t set at installation time, you will have to backup your data and re-install, as encryption is applied after disk partitioning but before filesystem creation.
By default, cryptsetup does not set up authenticated encryption. If you are configuring partitioning using the command line, you can enable integrity with the --integrity argument.
Encrypted Swap
Consider using encrypted swap or ZRAM instead of unencrypted swap to avoid potential security issues with sensitive data being pushed to swap space. While ZRAM can be set up post-installation, if you want to use encrypted swap, you should set it up while partitioning your drive.
Depending on your distribution, encrypted swap may be automatically set up if you choose to encrypt your drive. Fedora uses ZRAM by default, regardless of whether you enable drive encryption or not.
Privacy Tweaks
NetworkManager Trackability Reduction
Most desktop Linux distributions including Fedora, openSUSE, Ubuntu, and so on come with NetworkManager by default to configure Ethernet and Wi-Fi settings.
wj25czxj47bu6q has detailed guide on trackability reduction with NetworkManager which I highly recommend you check out.
In short, if you use NetworkManager, add the following to your /etc/NetworkManager/conf.d/00-macrandomize.conf:
[device]
wifi.scan-rand-mac-address=yes
[connection]
wifi.cloned-mac-address=random
ethernet.cloned-mac-address=random
Then, restart your NetworkManager service:
sudo systemctl restart NetworkManager
Finally, set your hostname to localhost:
sudo hostnamectl hostname "localhost"
Note that randomizing Wi-Fi MAC addresses depends on support from the Wi-Fi card firmware.
Other Identifiers
There are other system identifiers which you may wish to be careful about. You should give this some thought to see if it applies to your threat model:
- Username
- Your username is used in a variety of ways across your system. Consider using generic terms like “user” rather than your actual name.
- Machine ID
- During installation a unique machine ID is generated and stored on your device. Consider setting it to a generic ID.
System Counting
Many Linux distributions send some telemetry by default to count how many systems are using their software. Consider disabling this depending on your threat model.
The Fedora Project offers a “countme” variable to much more accurately count unique systems accessing its mirrors without involving unique IDs. While currently disabled by default, you could add countme=false to /etc/dnf/dnf.conf in case the default changes in the future. On rpm‑ostree systems such as Fedora Silverblue and Kinoite, the countme option can be disabled by masking the rpm-ostree-countme timer.
openSUSE uses a unique ID to count systems, which can be disabled by emptying the /var/lib/zypp/AnonymousUniqueId file.
Zorin OS also uses a unique ID to count systems. You can opt‑out by running sudo apt purge zorin-os-census and optionally holding the package with sudo apt-mark hold zorin-os-census to avoid accidental reinstallation.
snapd (Snap) assigns a unique ID to your installation and uses it for telemetry. While this is generally not a problem, if your threat model calls for anonymity, you should avoid using Snap packages and uninstall snapd. Accidental reinstallation on Ubuntu can be prevented with sudo apt-mark hold snapd.
Of course, this is a non‑exhaustive list of telemetry on different Linux distributions. If you are aware of other tracking mechanisms used by these or other distributions, feel free to make a pull request or discussion post detailing them!
Keystroke Anonymization
You could be fingerprinted based on soft biometric traits when you use the keyboard. The Kloak package could help you mitigate this threat. It is available as a .deb package from Kicksecure’s repository and an AUR package.
With that being said, if your threat model calls for using something like Kloak, you are probably better off just using Whonix.
Application Confinement
Some sandboxing solutions for desktop Linux distributions do exist; however, they are not as strict as those found in macOS or ChromeOS. Software installed with distro package managers (DNF, APT, etc.) typically have no sandboxing or confinement whatsoever. Several projects which aim to tackle this problem are discussed here.
Flatpak
Flatpak aims to be a distribution-agnostic package manager for Linux. One of its main goals is to provide a universal package format which can be used in most Linux distributions. It provides some permission control. With that being said, Flatpak sandboxing is quite weak.
You can restrict applications further by setting Flatpak overrides. This can be done with the command line or by using Flatseal. To deny common dangerous Flatpak permissions globally, run the following commands:
sudo flatpak override --system --nosocket=x11 --nosocket=fallback-x11 --nosocket=pulseaudio --nosocket=session-bus --nosocket=system-bus --unshare=network --unshare=ipc --nofilesystem=host:reset --nodevice=input --nodevice=shm --nodevice=all --no-talk-name=org.freedesktop.Flatpak --no-talk-name=org.freedesktop.systemd1 --no-talk-name=ca.desrt.dconf --no-talk-name=org.gnome.Shell.Extensions
flatpak override --user --nosocket=x11 --nosocket=fallback-x11 --nosocket=pulseaudio --nosocket=session-bus --nosocket=system-bus --unshare=network --unshare=ipc --nofilesystem=host:reset --nodevice=input --nodevice=shm --nodevice=all --no-talk-name=org.freedesktop.Flatpak --no-talk-name=org.freedesktop.systemd1 --no-talk-name=ca.desrt.dconf --no-talk-name=org.gnome.Shell.Extensions
To allow Flatseal to function after applying the overrides above, run the following command:
flatpak --user override com.github.tchx84.Flatseal --filesystem=/var/lib/flatpak/app:ro --filesystem=xdg-data/flatpak/app:ro --filesystem=xdg-data/flatpak/overrides:create
Note that this only helps with lax, high‑level default permissions and cannot solve the low‑level issues like /proc and /sys access or an insufficient seccomp blacklist.
Some sensitive permissions of note:
--share=network: network and internet access--socket=pulseaudio: the PulseAudio socket, grants access to all audio devices (including inputs)--socket=session-bus: access to the entire session bus, which can be used to break out of the sandbox by abusing dangerous D‑Buses.--socket=system-bus: access to the entire system bus, which can be used to break out of the sandbox by abusing dangerous D‑Buses.--device=all: access to all devices (including webcams)--talk-name=org.freedesktop.secrets: D‑Bus access to secrets stored on your keychain--talk-name=org.freedesktop.Flatpak: D‑Bus access to run flatpak run. This D‑Bus is a sandbox escape.talk-name=org.freedesktop.systemd1: D‑Bus access to systemd. This D‑Bus can be used to load in systemd services with arbitary code and run them.--talk-name=ca.desrt.dconf: D‑Bus access to dconf. This D‑Bus can be abused to run arbitary commands by changing key bindings.--talk-name=org.gnome.Shell.Extensions: D‑Bus access to install and manage GNOME shell extensions. This D‑Bus can be abused to add malicious extensions to GNOME.
If an application works natively with Wayland (not running through the XWayland compatibility layer), consider revoking its access to X11 (--nosocket=x11) and the inter‑process communications (IPC) socket (--unshare=ipc) as well.
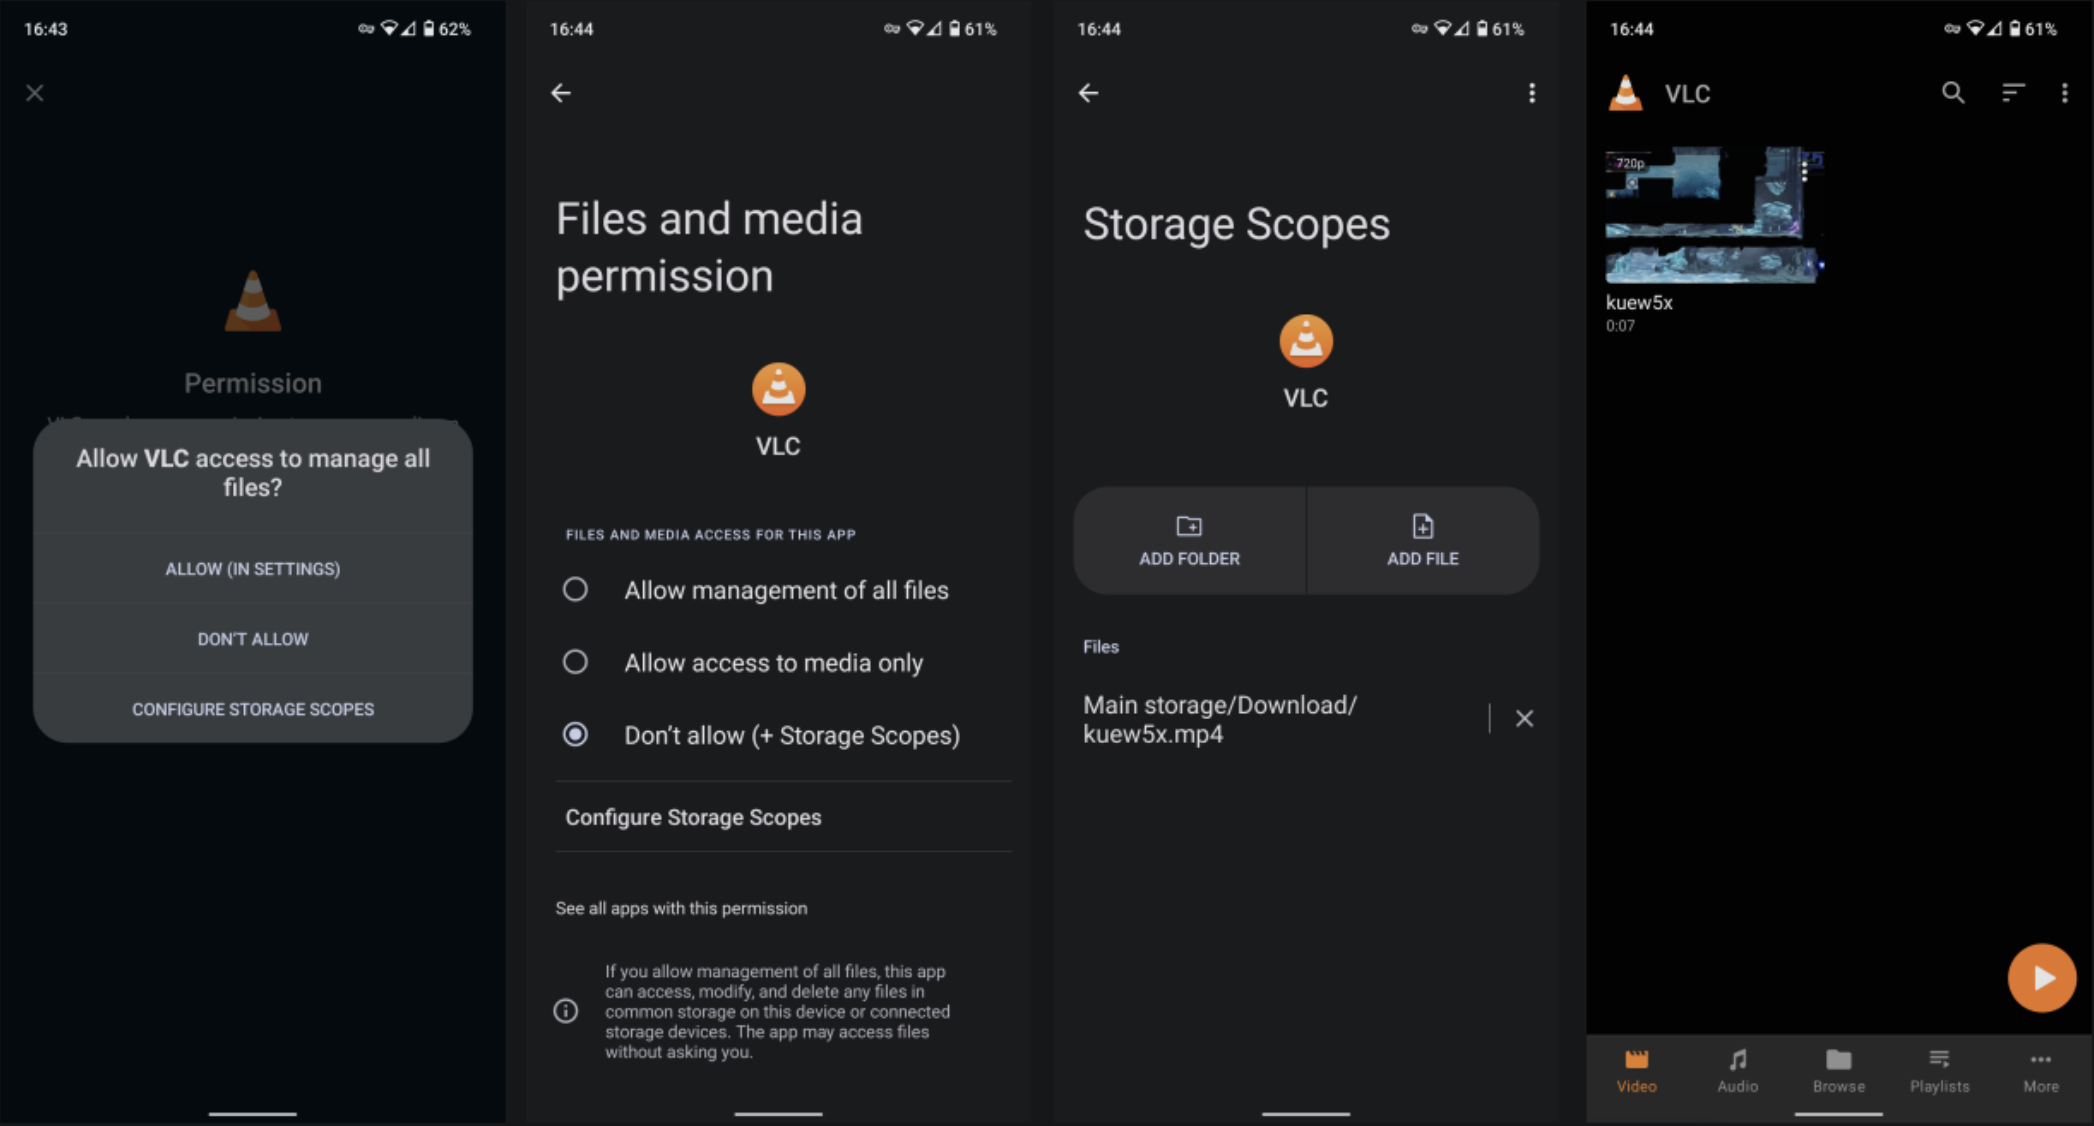
Many Flatpak apps ship with broad filesystem permissions such as --filesystem=home and --filesystem=host. Some applications implement the Portal API, which allows a file manager to pass files to the Flatpak application (e.g. VLC) without specific filesystem access privileges. Despite this, many of them still declare --filesystem=host.
My strategy to deal with this is to revoke all filesystem access first, then test if an application works without it. If it does, it means the app is already using portals and no further action is needed. If it doesn’t, then I start granting permission to specific directories.
As odd as this may sound, you should not enable (blind) unattended updates of Flatpak packages. If you or a Flatpak frontend (app store) simply executes flatpak update -y, Flatpaks will be automatically granted any new permissions declared upstream without notifying you. Enabling automatic updates with GNOME Software is fine, as it does not automatically update Flatpaks with permission changes and notifies the user instead.
Snap
Snap is another distribution-agnostic package manager with some sandboxing support. It is developed by Canonical and heavily promoted in Ubuntu.
Snap packages come in two variants: classic, with no confinement, and strictly confined, where AppArmor and cgroups v1 are used to facilitate sandboxing. If a snap uses classic confinement (“classic snap”), you are better off installing an equivalent package from your distribution’s repository if possible. If your system does not have AppArmor, then you should avoid Snap entirely. Additionally, most modern systems outside of Ubuntu and its derivatives use cgroups v2 by default, so you have to set systemd.unified_cgroup_hierarchy=0 in your kernel parameters to get cgroups v1 working.
Snap permissions can be managed via the Snap Store or Ubuntu’s custom patched GNOME Control Center.
On Ubuntu, you can replace various .deb packages with strictly confined snaps to minimize the attack surface. Some examples of these packages are the printing stack or ufw:
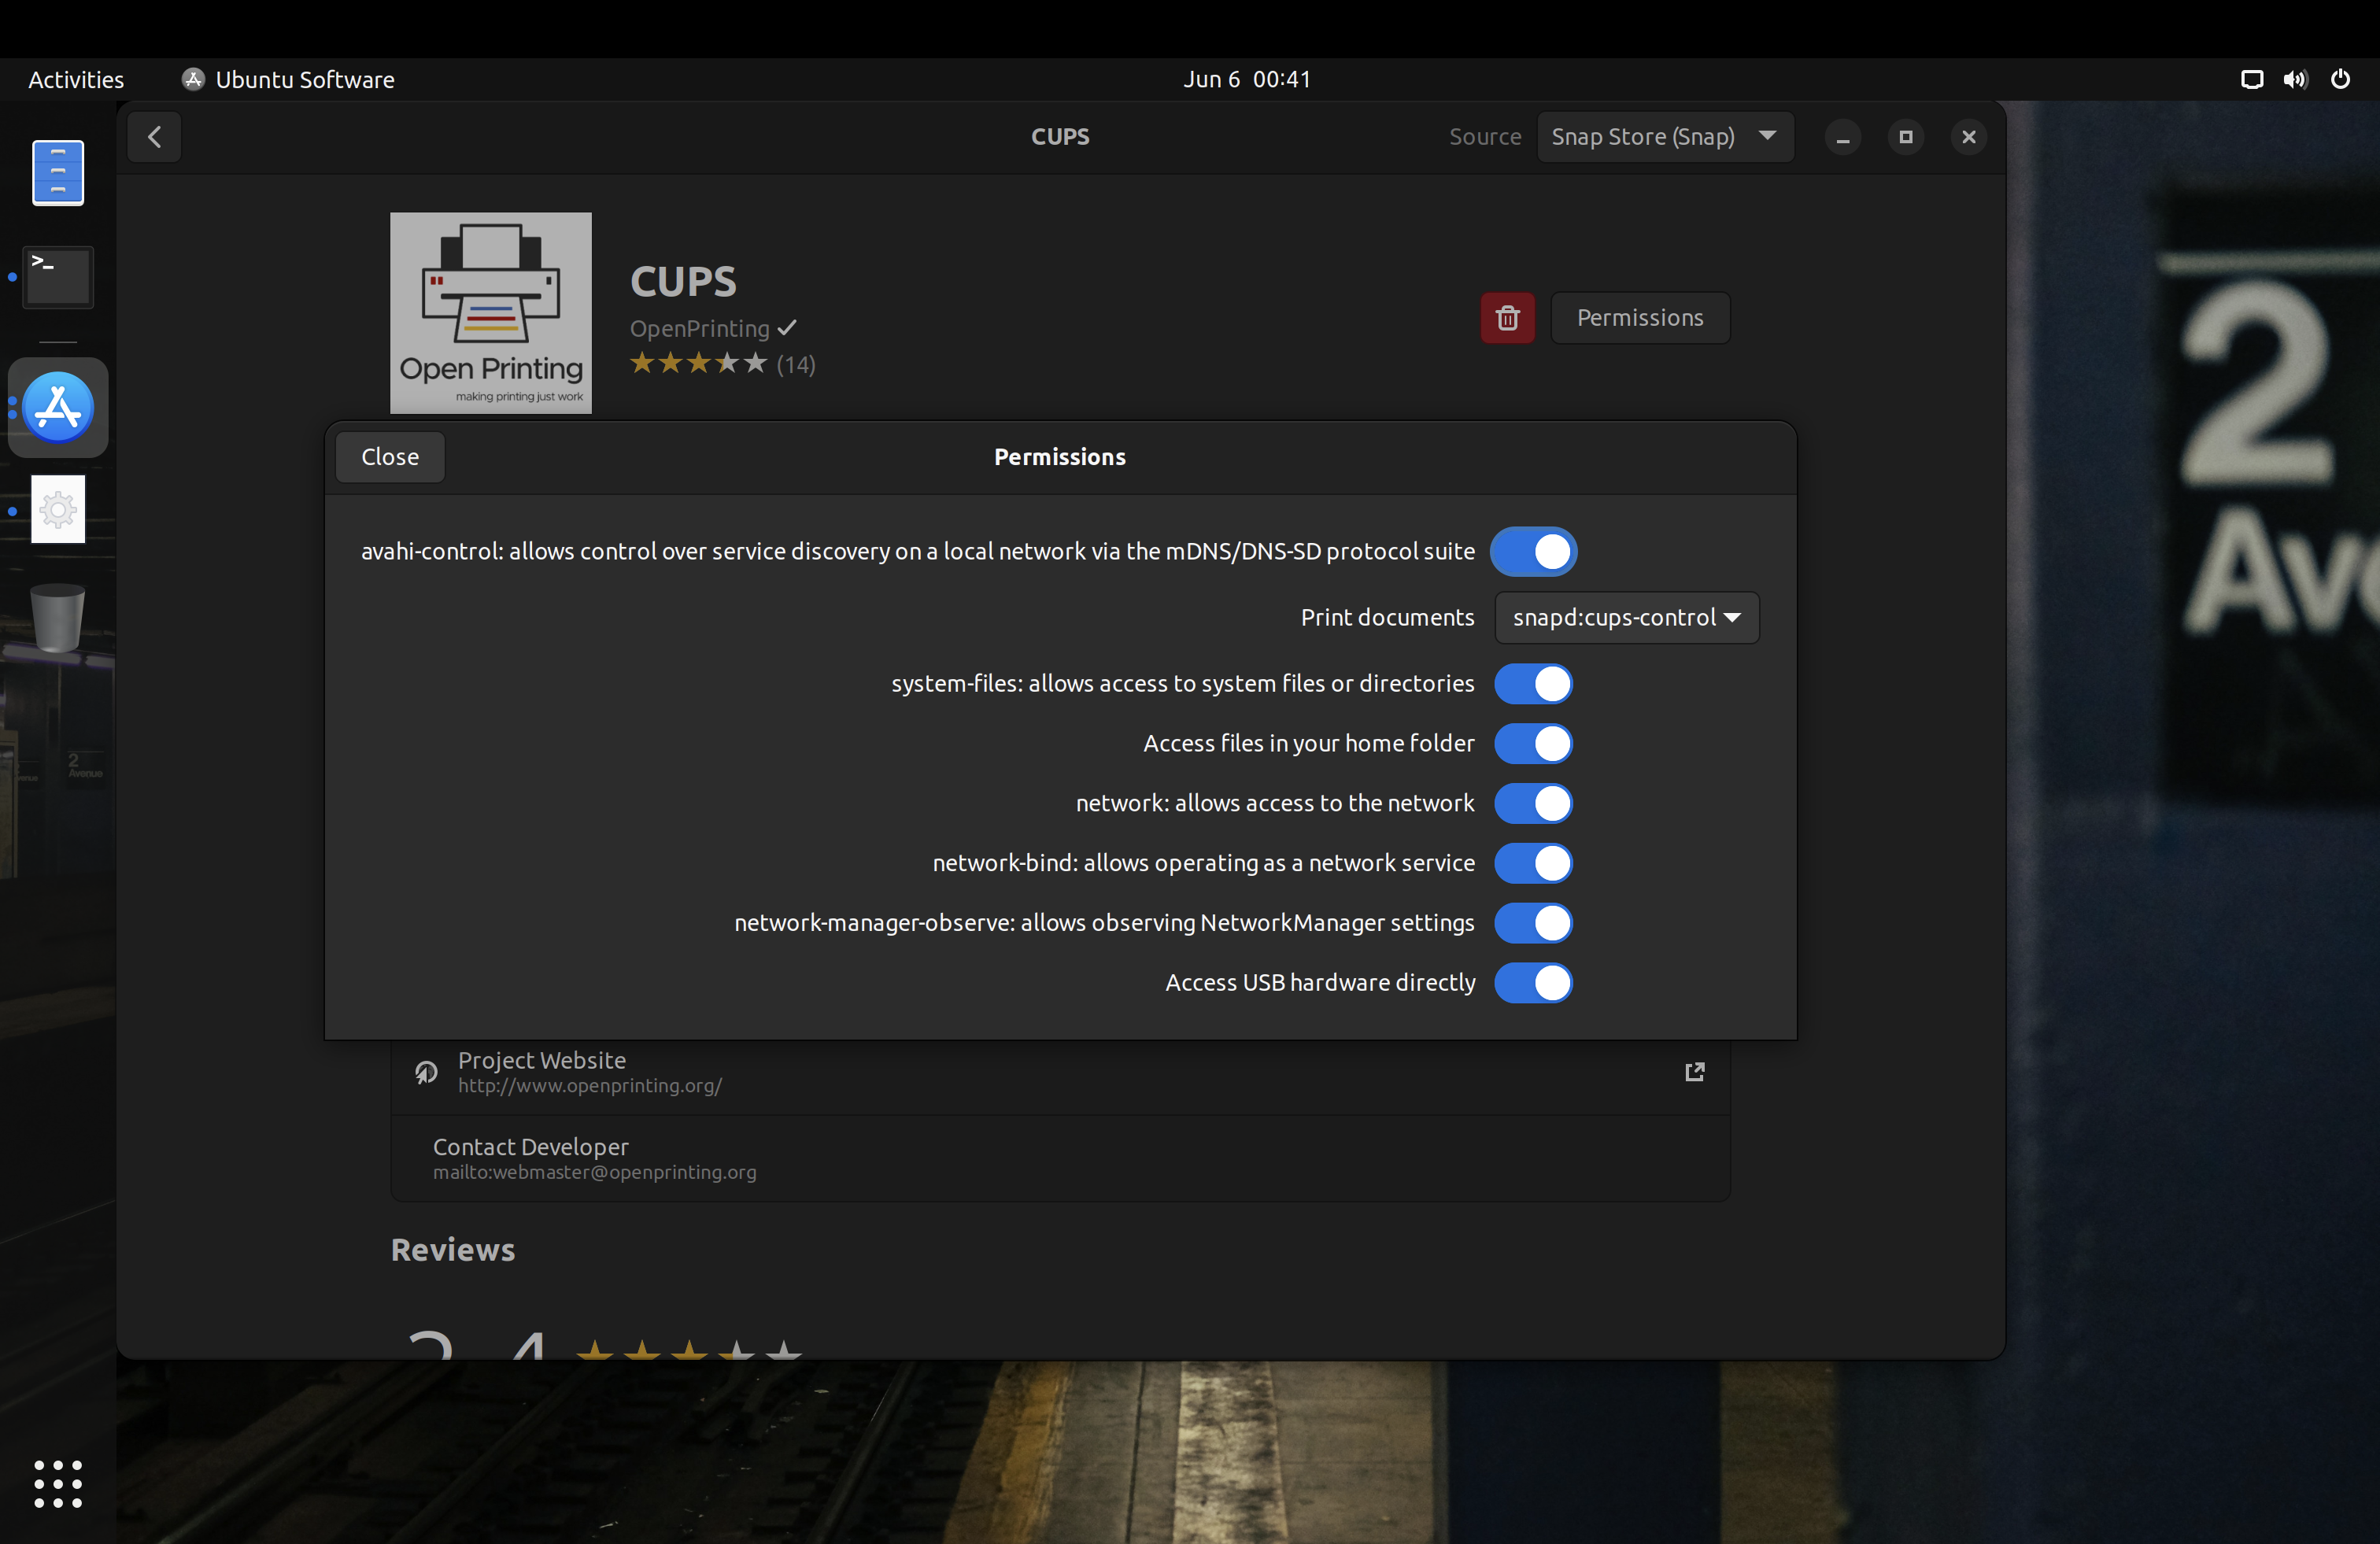
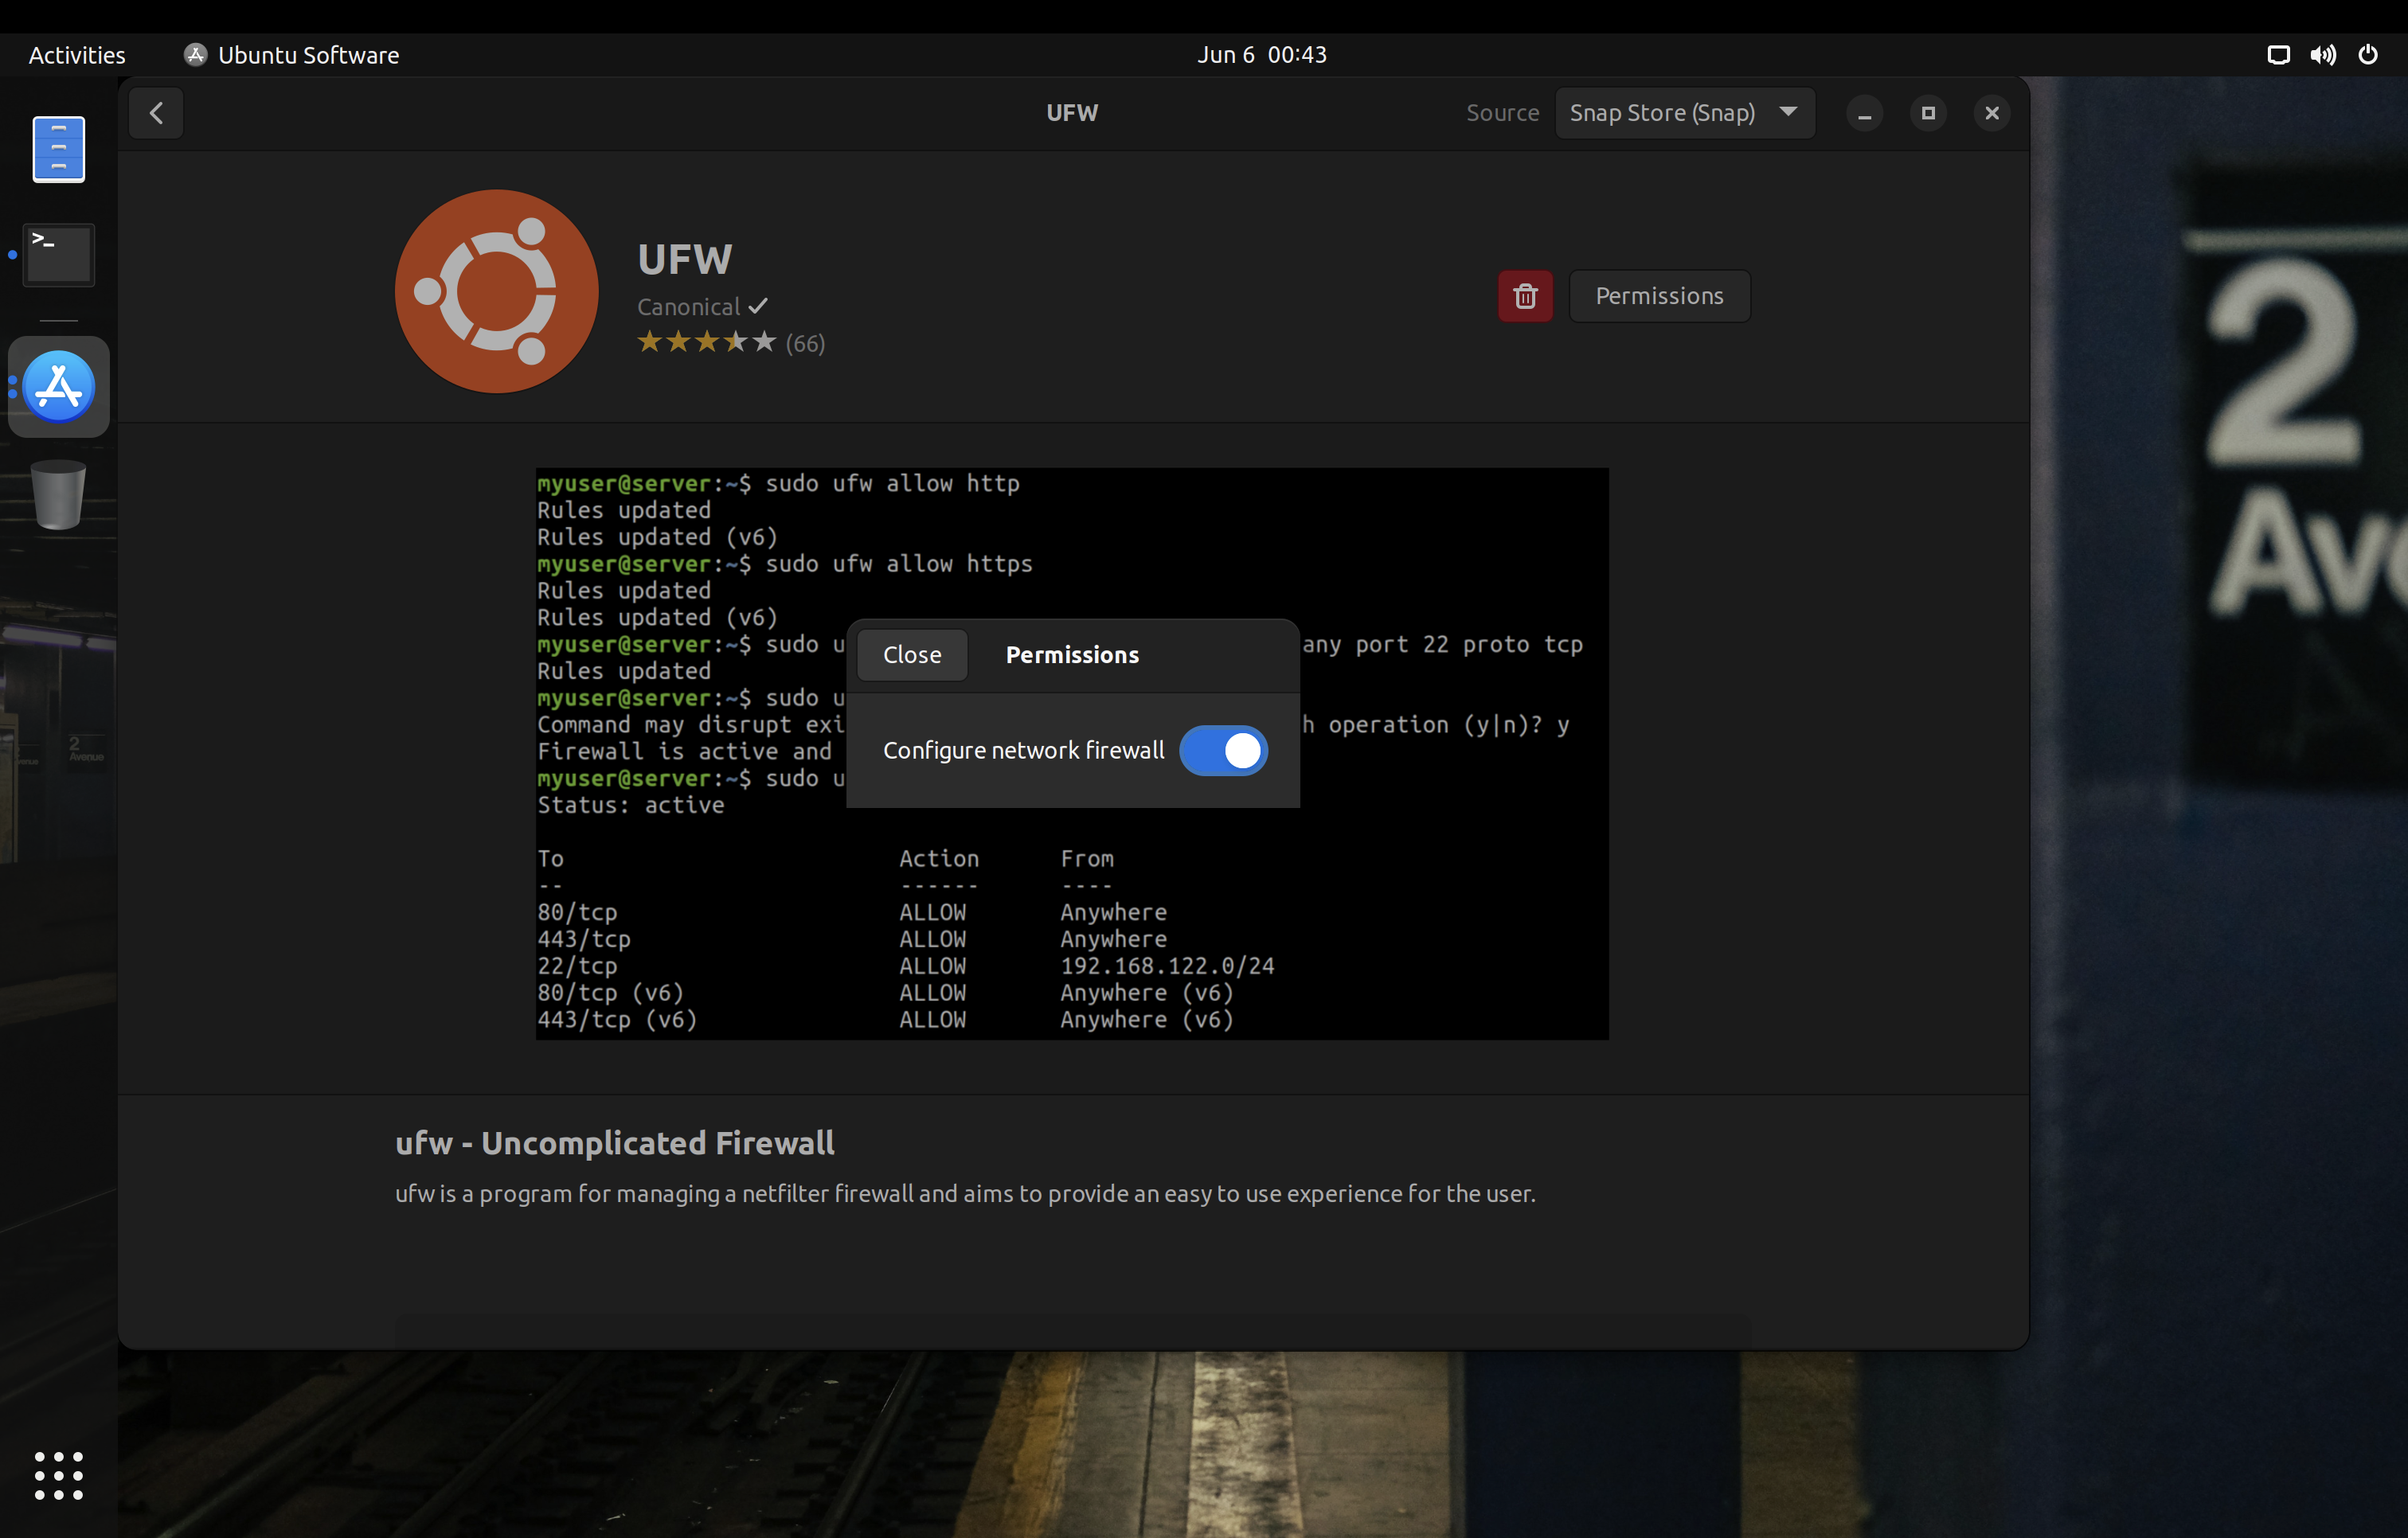
One caveat with Snap packages is that you only have control over the interfaces declared in their manifests. For example, Snap has separate interfaces for audio-playback and audio-record, but some packages will only declare the legacy pulseaudio interface which grants access to both play and record audio. Likewise, some applications may work perfectly fine with Wayland, but the package maintainer may only declare the X11 interface in their manifest. For these cases, you need to reach out to the maintainer of the snap to update the manifest accordingly.
Firejail
Firejail is another method of sandboxing. As it is a large setuid binary, it has a large attack surface which increase susceptibility to privilege escalation vulnerabilities. Madaidan offers additional details on how Firejail can worsen the security of your device.
If you do use Firejail, Firetools can help to quickly manage application permissions and launch sandboxed applications. Note that Firetools configurations are temporary with no option to save profiles for long‑term use.
Firejail can also confine X11 windows using Xpra or Xephr, something that Flatpak and Snap cannot do. I highly recommend checking out their documentation on X11 sandboxing.
One trick to launch applications with their Firejail profile is to use the sudo firecfg command. This will create a symlink /usr/local/bin/app_name_here pointing to Firejail, which will get used automatically by most .desktop files (which do not specify the absolute paths of their binaries) to use will launch the application through the symlink and have Firejail sandbox them this way. Of course, this is bypassable if you or some other applications launch the application directly from /usr/bin/app_name_here instead.
Mandatory Access Control
Common Linux mandatory access control (MAC) frameworks require policy files in order to force constraints on the system. The two most notable are SELinux (used on Android and Fedora‑based distributions) and AppArmor (used on Debian‑based distributions and most openSUSE variants).
Fedora includes SELinux preconfigured with some policies to confine system daemons (background processes). You should keep it in enforcing mode.
openSUSE gives the choice of SELinux or AppArmor during the installation process. You should stick to the default for each variant (AppArmor for Tumbleweed and SELinux for MicroOS). openSUSE’s SELinux policies are derived from Fedora.
Arch and its derivatives often do not come with a mandatory access control system, and you must manually install and configure AppArmor.
Note that, unlike Android, traditional desktop Linux distributions typically do not have full system Mandatory Access Control policies; only a few system daemons are actually confined.
Making Your Own Policies/Profiles
You can make your own AppArmor profiles, SELinux policies, bubblewrap profiles, and seccomp blacklists to have better confinement of applications. This is an advanced and sometimes tedious task, but there are various projects you could use as reference:
Securing Linux Containers
If you’re running a server, you may have heard of containers. They are more common in server environments where individual services are built to operate independently. However, you may sometimes see them on desktop systems as well, especially for development purposes.
Docker is one of the most popular container solutions. It does not offer a proper sandbox, meaning there is a large kernel attack surface. You should follow the Docker and OCI Hardening guide to mitigate this problem. In short, there are things you can do like using rootless containers (via configuration changes or Podman), using a runtime which provides a pseudo‑kernel for each container (gVisor), and so on.
Another option is Kata Containers which masquerades virtual machines as containers. Each Kata container has its own kernel and is isolated from the host.
Security Hardening

Ubuntu Pro
If you are using Ubuntu LTS, consider subscribing to Ubuntu Pro. Canonical currently allows up to 5 machines with the free subscription.
You will also gain access to the Canonical Livepatch Service, which provides livepatching for certain kernel variants. Note that the Hardware Enablement (HWE) kernel is not supported.
While livepatching is less than ideal and I still recommend regularly rebooting your computer, it is quite nice to have.
Umask 077
On distributions besides openSUSE, consider changing the default umask for both root and regular users to 077 (symbolically, u=rwx,g=,o=). On openSUSE, a umask of 077 can break snapper and is thus not recommended.
On Ubuntu, the “Software & Update” application will not work properly if the repository lists in /etc/apt/sources.list.d have the 600 permission. You should make sure that they have the 644 permission instead.
The configuration for this varies per distribution, but typically it can be set in /etc/profile, /etc/bashrc, or /etc/login.defs.
Note that, unlike on macOS, this will only change the umask for the shell. Files created by running applications will not have their permissions set to 600.
Microcode Updates
You should make sure your system receives microcode updates to get fixes and mitigations for CPU vulnerabilities like Meltdown and Spectre.
Debian does not ship microcode updates by default, so be sure to enable the non-free repository and install the microcode package.
On Arch Linux, make sure you have the intel-ucode or amd-ucode package installed.
If you are looking to use the GNU Guix distribution, you should absolutely use the Nonguix channel or similar to get microcode updates.
Avoid the Linux-libre kernel at all costs, as they actively block loading binary‑only microcode.
Firmware Updates
Many hardware vendors offer firmware updates to Linux systems through the Linux Vendor Firmware Service. You can download and install updates using the following commands:
# Update metadata
fwupdmgr refresh
# Download and install firmware updates
fwupdmgr update
Some distributions like Debian do not have fwupd installed by default, so you should check for its existence on your system and install it if needed.
Several graphical frontends integrate with fwupd to offer firmware updates (GNOME Software, KDE Discover, Snap Store, GNOME Firmware, Pop!_OS Settings app). However, not all distributions offer this integration by default, so you should check your specific system and set up scheduled update notifications using systemd timers or cron if needed.
Firewall
A firewall may be used to secure connections to your system.
Red Hat distributions (such as Fedora) and openSUSE typically use firewalld. Red Hat maintains extensive documentation about firewalld and its graphical frontend firewall-config.
Distributions based on Debian or Ubuntu typically use the Uncomplicated Firewall (ufw). As the name suggests, it is much less sophisticated than firewalld. One notable missing feature is the ability to apply different firewall rules for different connections (see zones in firewalld).
You could also set your default firewall zone to drop packets. To implement this with firewalld (with the necessary exceptions for IPv6):
firewall-cmd --set-default-zone=drop
firewall-cmd --add-protocol=ipv6-icmp --permanent
firewall-cmd --add-service=dhcpv6-client --permanent
firewall-cmd --reload
On some distributions, it may be possible for applications running as a wheel or sudo user to make firewall changes through polkit. To prevent this, enable firewalld lockdown mode with sudo firewall-cmd --lockdown-on.
These firewalls use the netfilter framework and therefore cannot (without the help of strict mandatory access control) protect against malicious software running privileged on the system, which can insert their own routing rules that sidestep firewalld/ufw.
There are some per‑binary outbound firewalls such as OpenSnitch and Portmaster that you could use as well. But, just like firewalld and ufw, they are bypassable.
If you are using Flatpak packages, you can set an override to block network access. This is not bypassable.
If you are using non‑classic Snap packages on a system that supports proper confinement (both AppArmor and cgroups v1 present), you can use the Snap Store to revoke network permission. This is also not bypassable.
Kernel Hardening
There are several things you can do to harden the Linux kernel, including setting appropriate kernel parameters and blacklisting unnecessary kernel modules. If you are using Kicksecure or Whonix, most of this hardening is included by default. If you are using Debian, you should consider morphing it into Kicksecure.
This section extensively references Madaidan’s Linux Hardening Guide and in the interest of brevity does not repeat all the information contained there. You are strongly encouraged to read through the relevant sections of Madaidan’s guide (linked for convenience).
Runtime Kernel Parameters (sysctl)
See “2.2 Sysctl” in Madaidan’s guide.
Madaidan recommends that you disable unprivileged user namespaces due to the significant attack surface for privilege escalation. However, some software such as Podman and LXC relies on unprivileged user namespaces. If you wish to use such software, do not disable kernel.unprivileged_userns_clone. Note that this setting does not exist in the upstream kernel and is added downstream by some distributions.
On distributions other than Whonix and Kicksecure, you can copy the configuration file from Tommy’s repository.
Boot Parameters
See “2.3 Boot parameters” in Madaidan’s guide. If desired, formal documentation of boot parameters is available upstream.
Copy these parameters into your bootloader’s configuration. On rpm‑ostree distributions, make sure to use rpm-ostree kargs rather than editing GRUB configuration directly.
CPU mitigations
mitigations=auto,nosmt spectre_v2=on spectre_bhi=on spec_store_bypass_disable=on tsx=off kvm.nx_huge_pages=force nosmt=force l1d_flush=on spec_rstack_overflow=safe-ret gather_data_sampling=force reg_file_data_sampling=on
Simultaneous multithreading (SMT) has been the cause of numerous hardware‑level vulnerabilities and is thus disabled here. If the option is available, you should disable SMT/“Hyper‑Threading” in your firmware as well.
Note however that disabling SMT may have a significant performance impact — for this reason the popular linux‑hardened kernel for Arch does not disable SMT by default. Assess your own risk tolerance, and, if you choose to keep SMT enabled, simply remove all occurrences of nosmt and nosmt=force from these parameters.
Kernel
slab_nomerge init_on_alloc=1 init_on_free=1 pti=on vsyscall=none ia32_emulation=0 page_alloc.shuffle=1 randomize_kstack_offset=on debugfs=off oops=panic quiet loglevel=0
Kicksecure does not enforce either module.sig_enforce=1 or lockdown=confidentiality by default as they lead to a lot of hardware compatibility issues; consider enabling these if possible on your system. Additionally, mce=0 is no longer recommended.
Entropy generation
random.trust_cpu=off random.trust_bootloader=off
Some implementations of the RDRAND instruction (by which the CPU offers a random number generator to the OS) have proven to be vulnerable or outright defective. RDRAND is also impossible to audit, being part of the CPU itself.
As a precaution for the integrity of cryptographic operations, the CPU and bootloader should not be used as credited entropy sources. Note that this change will increase boot time.
Further reading:
DMA mitigations
intel_iommu=on amd_iommu=force_isolation efi=disable_early_pci_dma iommu=force iommu.passthrough=0 iommu.strict=1
Direct memory access (DMA) attacks can be mitigated via IOMMU and disabling certain kernel modules. Furthermore, strict enforcement of IOMMU TLB invalidation should be applied so devices will never be able to access stale data contents.
These parameters do not provide comprehensive DMA protection. In early boot (before the kernel has loaded), only the system firmware can enforce IOMMU and thus provide DMA protection. A DMA attack in early boot can patch the kernel in memory to completely undermine these parameters.
Note that disabling the busmaster bit on all PCI bridges during very early boot (efi=disable_early_pci_dma) can cause complete boot failure on certain systems with inadequate resources. Therefore, as always, ensure you have a fallback option to boot into the system whenever modifying any kernel parameters.
Further reading:
Kernel Modules
See “2.5.2 Blacklisting kernel modules” in Madaidan’s guide.
On distributions other than Whonix and Kicksecure, you can copy the configuration file from secureblue’s repository into /etc/modprobe.d/.
There are a few things in this config to keep in mind:
- Bluetooth is disabled. Comment out the
install bluetooth and install btusb lines to use Bluetooth.
- Thunderbolt is disabled. Comment out the
install thunderbolt line to use Thunderbolt devices.
- The
cdrom and sr_mod modules are merely blacklisted; they can still be loaded at runtime with modprobe. If you have no intention to ever use CD‑ROM devices, they should be disabled by adding the lines install cdrom /bin/false and install sr_mod /bin/false to the config. (More about how this works on the ArchWiki)
- Apple filesystems are disabled. While generally fine on non‑Apple systems, if you are using an Apple device you must check the filesystem of your EFI partition and comment out the relevant
install line, otherwise your Linux install will not boot. For example, comment out the install hfsplus line if your ESP filesystem is HFS+.
Restricting access to /proc and /sys
See “2.4 hidepid” and “2.7 Restricting access to sysfs” in Madaidan’s guide.
Disabling access to /sys without a proper whitelist will lead to various applications breaking. Developing such a whitelist will unfortunately be extremely tedious for most users. Kicksecure, and by extension Whonix, has the experimental proc-hidepid and hide-hardware-info services which do just this. From my testing, these work perfectly fine on minimal Kicksecure installations and both Qubes-Whonix-Workstation and Qubes-Whonix-Gateway.
linux-hardened
Some distributions like Arch Linux offer the linux‑hardened kernel package. It includes hardening patches and more security-conscious defaults.
linux‑hardened disables unprivileged user namespaces (kernel.unprivileged_userns_clone) by default. This may impact some software.
grsecurity
Grsecurity offers a set of kernel patches that attempt to improve security of the Linux kernel. Payment is required, but grsecurity is worth using if you have a subscription.
Hardened Memory Allocator
The hardened memory allocator (hardened_malloc) from GrapheneOS can be used on general Linux distributions, though only for some programs.
On Fedora and Red Hat Enterprise Linux, secureblue provides a Copr repository with both x86_64 and aarch64 architecture support. Divested Computing Group has a similar build for Fedora, but with only x86_64 support. Using secureblue’s repository is recommended, as the Divested repository is known to block certain IP addresses.
On Arch-based systems, hardened_malloc is available through the AUR.
Disabling XWayland
To disable XWayland with GNOME, create /etc/systemd/user/org.gnome.Shell@wayland.service.d/override.conf with the following content:
[Service]
ExecStart=
ExecStart=/usr/bin/gnome-shell --no-x11
Mountpoint Hardening
Consider adding the mount options nodev, noexec, and nosuid to mountpoints which do not need the respective capabilities. Typically, these can be applied to /boot, /boot/efi, and /var. These flags could also be applied to /home and /root, however noexec will prevent applications that require binary execution in those locations from working (including Flatpak and Snap).
It should be noted that noexec is not foolproof and actually quite easy to bypass.
If you use Toolbox, do not set any of these mount options on /var/log/journal. From my testing, the Toolbox container will fail to start if you have nodev, nosuid, or noexec on said directory. If you are on Arch Linux, you probably do not want to set noexec on /var/tmp, as some AUR packages will then fail to build.
Disabling SUID
SUID allows a user to execute an application as the owner of that application, which in many cases is the root user. Vulnerable SUID executables could lead to privilege escalation vulnerabilities.
It is desirable to remove SUID from as many binaries as possible; however, this takes substantial effort and trial and error on the user’s part, as some applications require SUID to function.
Kicksecure, and by extension Whonix, has an experimental permission hardening service and application whitelist to automate SUID removal from most binaries and libraries on the system. From my testing, these work perfectly fine on minimal Kicksecure installations and both Qubes-Whonix-Workstation and Qubes-Whonix-Gateway.
DNSSEC
Most Linux distributions do not enable DNSSEC by default. I recommend that you enable it to make sure that the responses to your DNS queries are authentic. You will need a DNS provider that supports DNSSEC. Ideally, you should use a VPN which provides this feature with its DNS servers so that you can also blend in with other people.
On systems with systemd-resolved, you can edit the /etc/systemd/resolved.conf file and add DNSSEC=yes to enable it. Run systemctl restart systemd-resolved after you are done editing to apply your configuration.
If you are a Whonix or Tails user, you can disregard setting up DNSSEC, as Tor DNS resolution does not support it. Alternatively, you can use a non-Tor resolver, though it is not recommended that you do this for an extended amount of time.
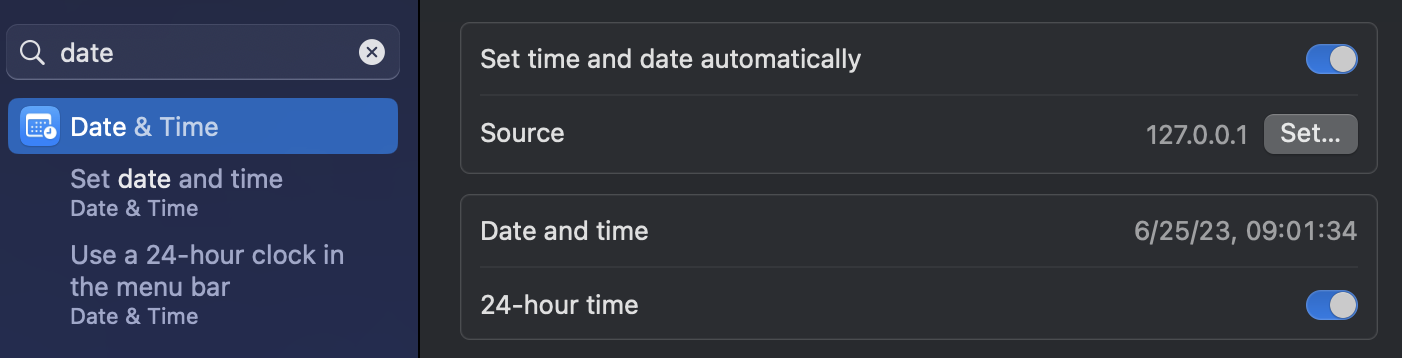
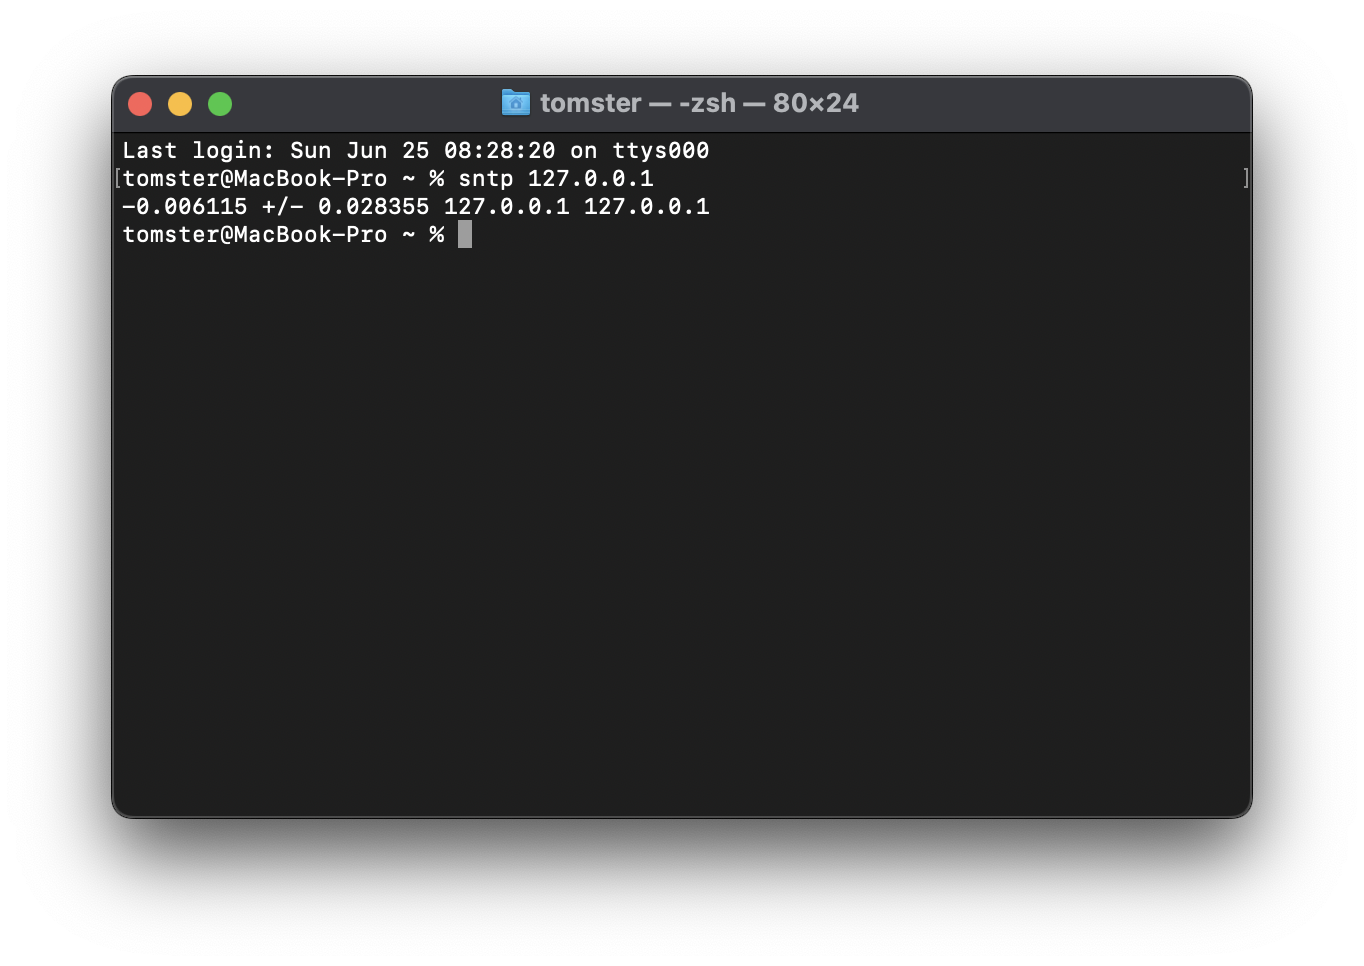
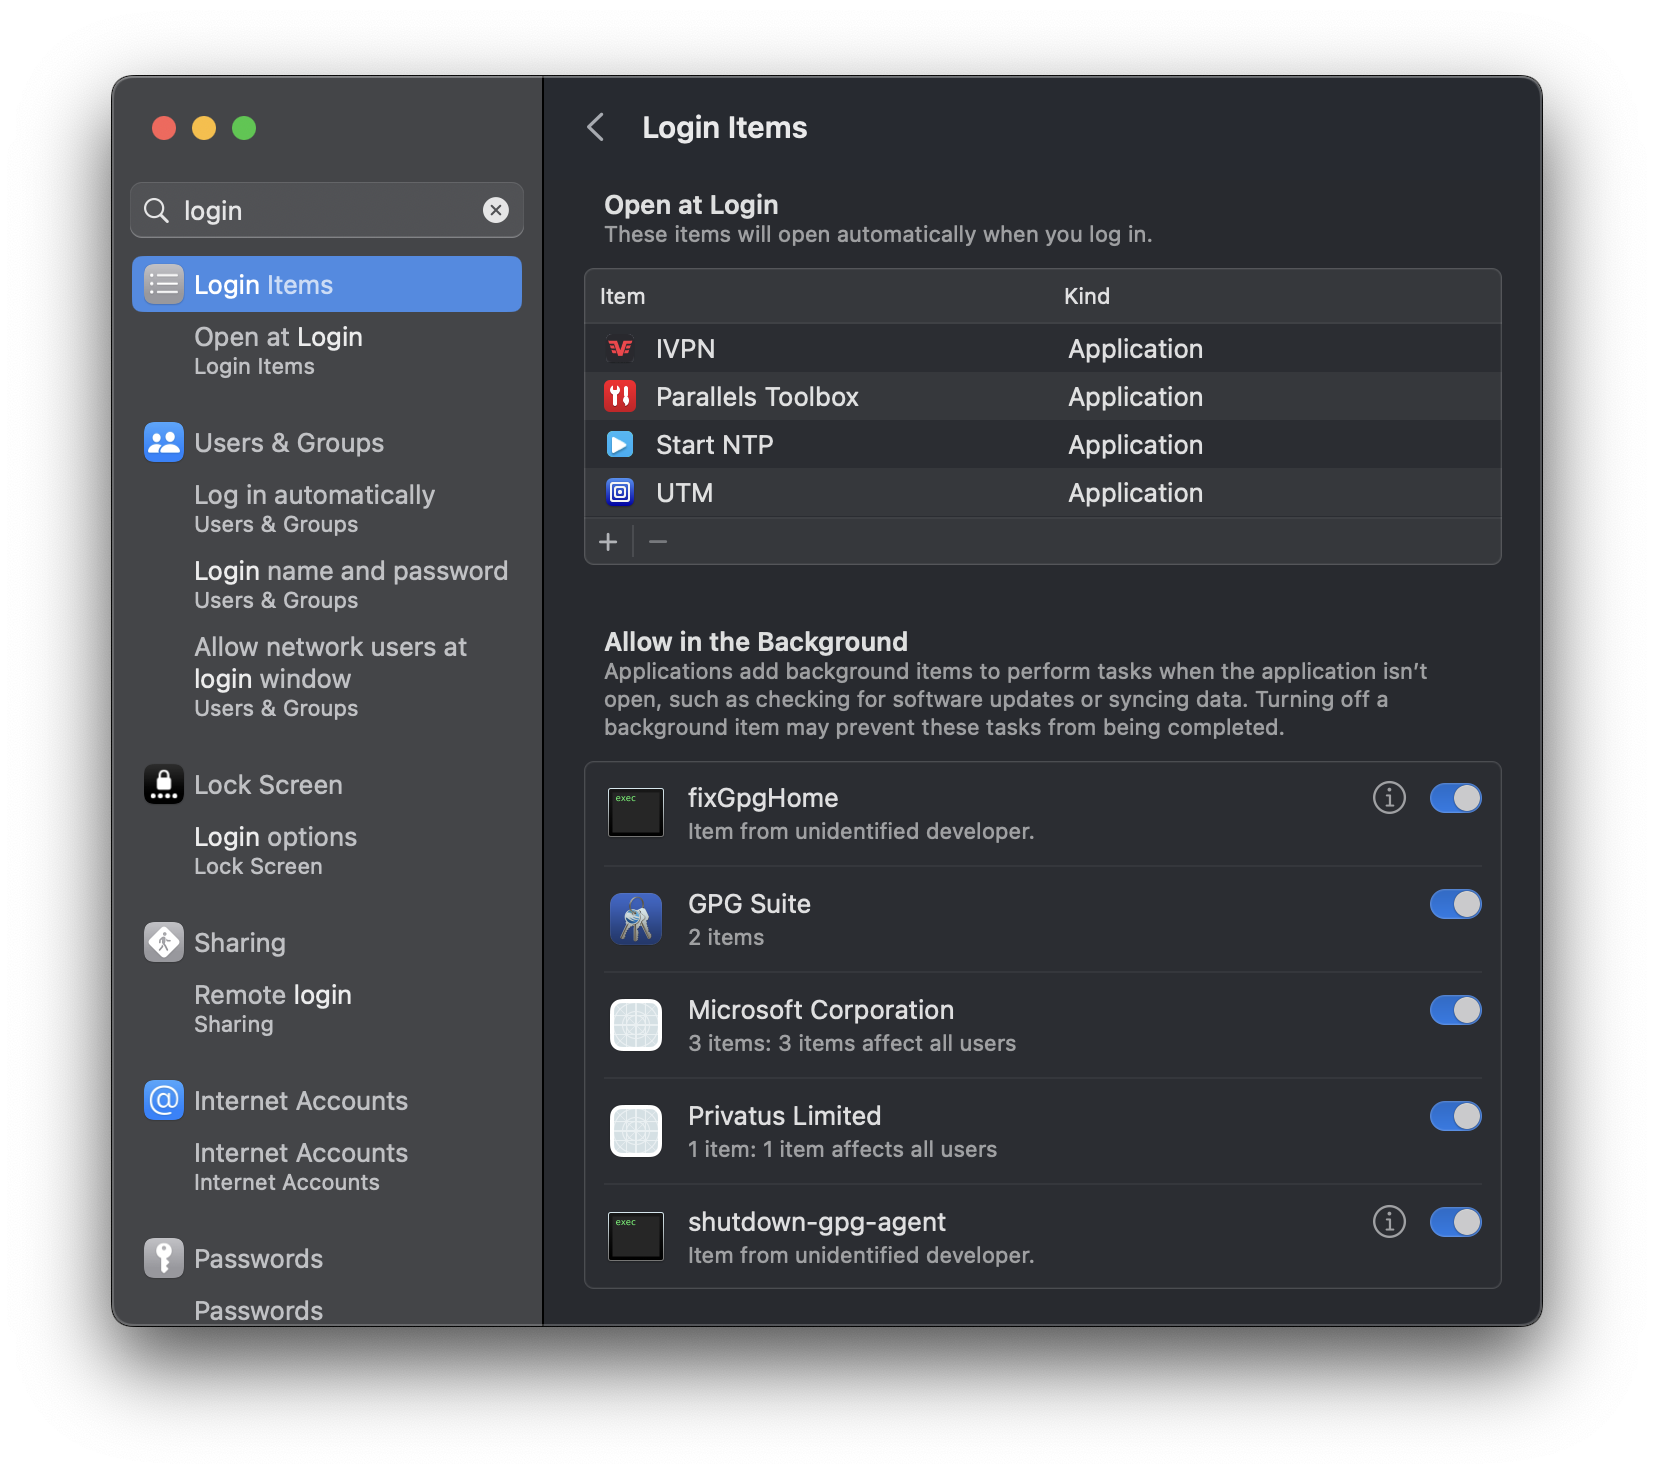
Time Synchronization
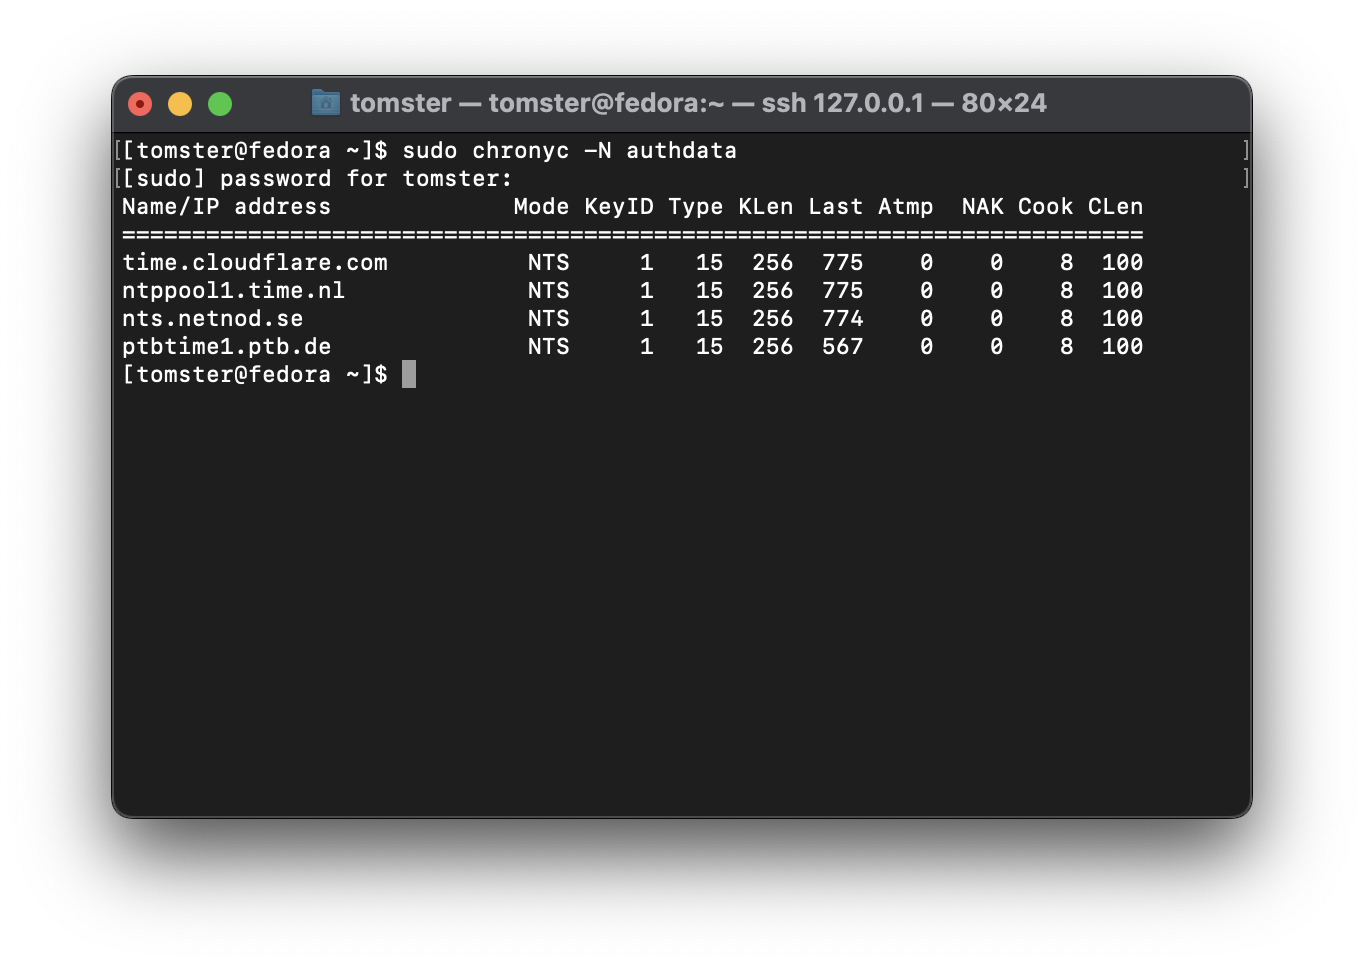
Most Linux distributions by default use the unencrypted and unauthenticated Network Time Protocol (NTP) for time synchronization. There are two ways to easily solve this problem:
If you decide on using NTS with chronyd, consider using multiple, independent time providers and setting minsources to a value greater than 1.
GrapheneOS uses a quite nice chrony configuration for their infrastructure. I recommend that you replicate their chrony.conf on your system.
Next, enable the secommp filter for chronyd. On Fedora and Arch Linux, you will need to edit Chrony’s environment file in /etc/sysconfig/chronyd:
# Command-line options for chronyd
OPTIONS="-F 1"
On Ubuntu and Debian, the environment file is /etc/default/chrony, and the seccomp filter should already be enabled by default.
Pluggable Authentication Modules (PAM)
PAM’s settings can be hardened to improve authentication security (though keep in mind the bypassable nature of PAM as opposed to encryption).
On Red Hat distributions, you can use authselect to configure this, e.g.:
sudo authselect select <profile_id, default: sssd> with-faillock without-nullok with-pamaccess
On systems where pam_faillock is not available, consider using pam_tally2 instead.
If you have a YubiKey or another U2F/FIDO2 authenticator, you can use pam-u2f to implement two‑factor authentication for login. Make sure to use a hardcoded origin and appid as indicated in the ArchWiki. Do not use the default identifier pam://$HOSTNAME which will break if your hostname changes.
Some Linux distributions and desktop environments automatically mount arbitary filesystems upon storage media insertion. This is a security risk, as an adversary can attach a malicious storage device to your computer to exploit vulnerable filesystem drivers.
This behavior is disabled by default on Whonix.
UDisks
GNOME users on systems with UDisks can mitigate this risk by running the following commands:
echo '[org/gnome/desktop/media-handling]
automount=false
automount-open=false' | sudo tee /etc/dconf/db/local.d/automount-disable

echo 'org/gnome/desktop/media-handling/automount
org/gnome/desktop/media-handling/automount-open' | sudo tee /etc/dconf/db/local.d/locks/automount-disable

sudo dconf update
This will disable automounting and prevent users from overriding that setting (without privileges).
Cinnamon uses the same configuration/commands except with cinnamon substituted in place of gnome. Other desktop environments based on GNOME 3 likely follow a similar pattern — use gsettings to investigate.
autofs
On older systems where autofs is used, you should mask the autofs service to disable this behavior.
USB Port Protection
To better protect your USB ports from attacks such as BadUSB and the infamous Hak5 USB Rubber Ducky, I recommend USBGuard. Documentation is available on the USBGuard website and ArchWiki.
If you are using linux‑hardened, you can alternatively use the deny_new_usb kernel parameter — see “Preventing USB Attacks with linux-hardened”.
Secure Boot
Secure Boot can be used to secure the boot process by preventing the loading of unsigned UEFI drivers and bootloaders.
One of the problems with Secure Boot, particularly on Linux, is that only the chainloader (shim), bootloader (GRUB), and kernel are verified in a typical setup. The initramfs is often left unverified and unencrypted, leaving the door open for an evil maid attack.
The firmware on most devices is also preconfigured to trust Microsoft’s keys for both Windows and third‑parties, leading to a large attack surface.
Enrolling your own keys
Please note that this procedure will brick some non‑compliant UEFI implementations. You should research your specific computer/motherboard, looking for reported successes and failures alike, before attempting. Ideally, you should be prepared to reprogram the EEPROM to a known‑good state if something goes catastrophically wrong. Integrated ‘BIOS flashback’ functionality may be an adequate recovery option.
To eliminate the need to trust the OEM’s keys, I recommend using sbctl.
First, you need to boot into your firmware interface and enter Secure Boot setup mode. Then boot back into Linux and follow the instructions to generate and enroll your own keys.
On certain hardware, this will not work. Instead, you will need to export the public key to your EFI partition and manually import it through your firmware interface:
openssl x509 -in /usr/share/secureboot/keys/db/db.pem -outform DER -out /boot/efi/EFI/fedora/DB.der
Unified Kernel Image
On most desktop Linux systems, it is possible to create a unified kernel image (UKI) that contains the kernel, initramfs, and microcode. This unified kernel image can then be signed with the keys created by sbctl.
For Fedora Workstation, you can follow Håvard Moen’s guide which covers sbctl installation, unified kernel image generation with dracut, and automatic signing with systemd‑boot.
On Arch, the process is very similar, though sbctl is already included in the official repositories and you will need to switch from mkinitcpio to dracut. Arch with linux‑hardened works well with sbctl, but some level of tedious pacman hooks are required for appropriately timing the re‑signing of all relevant files every time the kernel or bootloader is updated.
Afterwards, you need to use systemd-cryptenoll and pin your encryption key against certain PCRs to detect tampering against the firmware. At minimum, you should pin PCR 7 for Secure Boot polices. Personally, I pin PCR 0,1,2,3,5,7, and 14.
Whenever you manually generate a UKI, make sure that the kernel is from the distribution vendor, and that initramfs is freshly generated. Reinstall the kernel package if you have to.
In my opinion, this is the most straightforward setup. However, it does not appear to work well with specialized setups such as Fedora Silverblue/Kinoite. More testing is needed to see if they can be made to work.
Notes on Secure Boot
After setting up Secure Boot, you should password-protect your UEFI settings (sometimes called ‘supervisor’ or ‘administrator’ password) as it is good security practice. This does not protect against an attacker with a programmer however - you need to pin PCRs to detect tampering as mentioned above.
These recommendations can make you a little more resistant to evil maid attacks, but they do not constitute a proper verified boot process as found on Android, ChromeOS, or Windows.
]]>